Serrated Y-Peeler Guide: Tips & Benefits
Published: 31 Dec 2025
A serrated Y-peeler is a simple kitchen tool, but it solves many peeling problems. In this Serrated Y-Peeler Guide: Tips & Benefits, you’ll learn why tiny blade teeth make peeling easier and cleaner. This guide is written for everyday cooks who want better results with less effort.
Many people struggle with soft or slippery produce like tomatoes and peaches. A serrated Y-peeler grips the skin instead of sliding over it. That means smoother peels, less waste, and more control in your hand. Ready to see how it works and when to use it?
What Is a Serrated Y-Peeler?
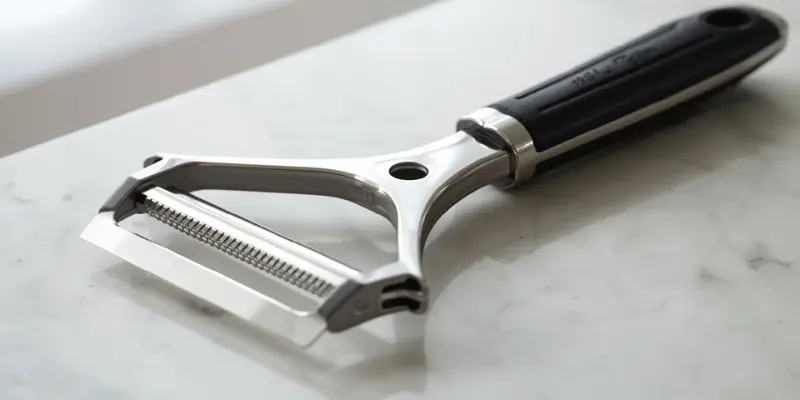
A serrated Y-peeler is a handheld peeling tool with a Y-shaped handle and a toothed blade. The small teeth help the blade grip food skins instead of slipping. This makes peeling smoother, especially for soft or delicate produce.
Unlike straight blades, serrated edges bite gently into the surface. You do not need to press hard or force the peel. That is why many home cooks prefer it for tricky fruits and vegetables.
How Serrated Blades Work
The tiny teeth catch the skin as you move the peeler. This creates steady contact with the surface. As a result, the peel comes off in thin, even strips without tearing.
Difference Between Serrated and Smooth Y-Peelers
Smooth peelers slide easily on firm foods like carrots. Serrated peelers work better on soft or slippery skins. Each has a purpose, but serrated blades offer more control on delicate produce.
Key Benefits of a Serrated Y-Peeler
A serrated Y-peeler offers clear advantages in everyday kitchen tasks. Its design focuses on grip, control, and comfort. These benefits make peeling faster and less frustrating.
Better Grip on Soft or Slippery Skins
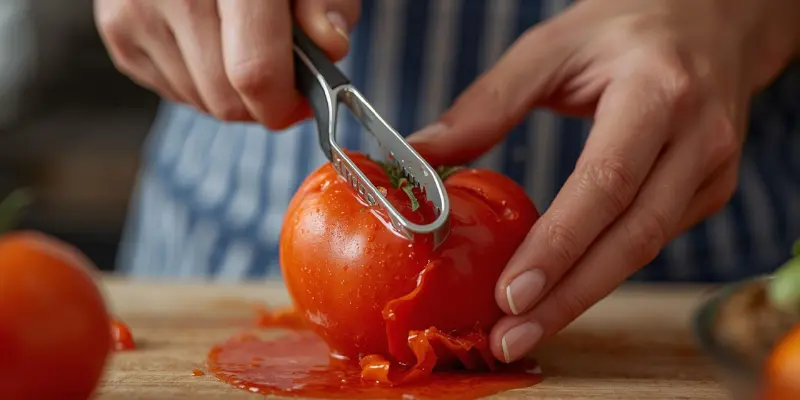
The serrated edge grips smooth skins that straight blades often miss. This works well for tomatoes, peaches, and kiwis. You get clean peels without repeated strokes.
Less Pressure Needed While Peeling
You do not need to push hard to remove the skin. The teeth do the work for you. This reduces hand strain and improves safety.
Cleaner Peels With Less Waste
Serrated blades stay close to the surface. They remove only the skin, not the flesh. This helps you save more food and keep cuts neat.
Foods That Work Best With a Serrated Y-Peeler
Not every fruit or vegetable peels the same way. A serrated Y-peeler performs best on foods with soft, thin, or slippery skins. Knowing when to use it helps you get cleaner results.
Soft-Skinned Fruits
Fruits like tomatoes and peaches have delicate skins. Straight blades often slide over them. Serrated edges grip easily and peel without crushing the fruit.
Thin-Skinned Vegetables
Zucchini and cucumbers peel smoothly with serrated blades. The peeler removes only the skin. This keeps the flesh intact and neat.
Delicate Produce That Tears Easily
Soft pears or ripe plums can tear with firm pressure. Serrated blades reduce slipping. This gives you better control and fewer damaged pieces.
For more details on how a Y‑peeler works, check out our Y‑peeler explained guide.
How to Use a Serrated Y-Peeler Properly
Using a serrated Y-peeler the right way improves safety and results. Small adjustments in grip and movement make a big difference. This is helpful, especially for beginners.
Correct Hand Position and Angle
Hold the handle firmly, but do not squeeze too hard. Keep the blade at a slight angle against the skin. This allows the teeth to catch without digging in.
Peeling Direction for Best Results
Use smooth, steady strokes instead of short, rough pulls. Pull the peeler toward you for better control. Let the serrated edge do the work.
Serrated vs Straight Y-Peeler (Quick Comparison)
Both serrated and straight Y-peelers are useful kitchen tools. The right choice depends on what you peel most often. A quick comparison makes the decision easier.
| Feature | Serrated Y-Peeler | Straight Y-Peeler |
| Blade type | Toothed edge for better grip | Smooth, flat blade |
| Best foods | Soft and slippery skins | Firm and hard skins |
| Ease of use | Less pressure needed | Needs steady pressure |
| Peeling result | Clean peels with less slip | Fast on firm produce |
| Maintenance | Needs careful cleaning | Easier to rinse clean |
Quick tip: Keep both peelers in your kitchen so you can choose the right one for each type of produce.
For a deeper look at how Y‑peelers compare to straight peelers, see our Y‑peeler vs straight peeler comparison.
Cleaning & Maintenance Tips
Proper cleaning keeps your serrated Y-peeler sharp and hygienic. Because the blade has small teeth, it needs a little extra care. Simple habits help it last longer.
How to Clean Serrated Blades Safely
Rinse the peeler right after use to remove stuck skins. Use a soft brush or sponge to clean between the teeth. Avoid pressing hard to protect the blade edge.
Preventing Rust and Dullness
Dry the peeler fully before storing it. Keep it in a dry drawer or hang it on a hook. This prevents moisture damage and keeps the blade sharp.
For more in-depth advice, explore our Serrated Y-Peeler Guide: Tips & Benefits to master peeling soft fruits and vegetables.
Top Tips for Getting the Best Results
Using a serrated Y-peeler correctly makes peeling faster and more efficient. These tips focus on technique and care without overcomplicating things.
- Always choose fresh, firm produce when possible.
- Peel slowly and let the serrated teeth do the work.
- Rinse the blade occasionally while peeling sticky skins.
- Keep your hands dry for better grip and control.
- Store separately from heavy utensils to avoid bending the blade.
FAQs About Serrated Y-Peelers
Here are the most common questions about Serrated Y-Peelers, with simple answers to help you cook perfectly every time.
Can I use a serrated Y-peeler on hard vegetables like carrots?
Yes, but it is not ideal. Straight peelers work better for firm vegetables. Serrated peelers shine with soft or slippery skins.
How do I sharpen a serrated Y-peeler?
Use a ceramic rod or a specialized serrated sharpener. Sharpen gently between the teeth to avoid damage.
Is a serrated Y-peeler dishwasher safe?
Some are, but handwashing is recommended. It prevents rust and keeps the blade sharper for longer.
Can I peel fruits without bruising them?
Yes, the serrated teeth reduce slipping and tearing. It works well on delicate fruits like peaches and tomatoes.
How long does a serrated Y-peeler last?
With proper care and cleaning, it can last several years. Avoid bending the blade or exposing it to moisture for long periods.
Key Takeaways
The Serrated Y-Peeler Guide: Tips & Benefits shows how this simple tool can make peeling soft and delicate produce easier, safer, and more efficient. Its serrated edge grips slippery skins, reduces hand strain, and minimizes food waste.
For home cooks and kitchen enthusiasts, choosing a serrated Y-peeler is a smart move, especially for tomatoes, peaches, and other delicate fruits. Keep it clean, dry, and store it safely to enjoy years of smooth peeling.
With these tips and proper care, your serrated Y-peeler can become a go-to tool in your kitchen, helping you save time and achieve perfect results every time.


- Be Respectful
- Stay Relevant
- Stay Positive
- True Feedback
- Encourage Discussion
- Avoid Spamming
- No Fake News
- Don't Copy-Paste
- No Personal Attacks
- Be Respectful
- Stay Relevant
- Stay Positive
- True Feedback
- Encourage Discussion
- Avoid Spamming
- No Fake News
- Don't Copy-Paste
- No Personal Attacks
