How to Clean a Baking Oven: 7 Shocking Secrets for a Spotless Oven
Published: 9 Dec 2025

Is your baking oven leaving stubborn stains or strange odors? Many home bakers struggle with grease, burnt-on spills, and cloudy oven doors that make cooking frustrating.
In this guide, we’ll reveal 7 shocking secrets to cleaning your baking oven quickly and effortlessly. From natural DIY methods to smart tips for deep cleaning, you’ll learn how to restore your oven to a spotless condition and say goodbye to baked-on grime and unpleasant smells.
Signs Your Oven Needs Cleaning
Even if your baking oven looks okay on the outside, signs of dirt and buildup may be hiding inside. Recognizing these early helps prevent stubborn grease, smoke, or uneven cooking. Here’s what to watch for:
- Smoke or Unpleasant Odor: If your oven produces smoke or smells burnt when heating, it’s a clear sign of leftover food residue or grease, which can affect cooking quality.
- Visible Grease and Stains: Baked-on spills, dark stains, or sticky spots on walls, racks, or trays indicate it’s time for a deep clean to prevent harder buildup later.
- Cloudy or Dirty Glass Door: When the oven glass becomes foggy or stained, it reduces visibility and shows that grime has accumulated over time, making monitoring food difficult.
- Uneven Cooking: If meals are burning in spots or taking longer to cook, accumulated residue may be affecting heat distribution and oven efficiency.
Regularly checking for these signs ensures your baking oven stays efficient, hygienic, and safe for cooking. Catching buildup early makes cleaning easier and prevents damage over time.
What You Need Before You Start — Tools & Safety Prep
Before you start cleaning your baking oven, it’s important to gather the right tools and take safety precautions. Proper preparation makes the process faster, easier, and prevents damage or accidents.
Essential Tools and Supplies
- Gloves: Protect your hands from chemicals, grime, and hot surfaces.
- Soft Cloths or Sponges: For wiping and scrubbing without scratching surfaces.
- Microfiber Cloth: Ideal for finishing touches on glass doors and exterior.
- Plastic Scraper or Spatula: Safely remove baked-on residue without damaging enamel.
- Bowl for Vinegar/Water: Needed for natural cleaning or steam methods.
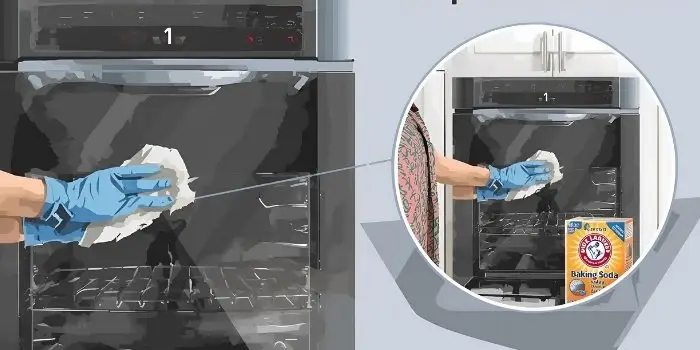
- Baking Soda and White Vinegar: Gentle, effective natural cleaners for the interior.
- Dish Soap: For soaking racks and light cleaning tasks.
- Optional Commercial Oven Cleaner: For stubborn, baked-on grease or deep cleaning.
Safety and Preparation Steps
- Ensure the oven is switched off and completely cooled before cleaning.
- Remove racks, trays, and any loose items to clean each part thoroughly.
- Ventilate your kitchen if using chemical cleaners to avoid fumes.
- Protect your countertops or floor with newspaper or cloths to catch drips.
- Check your oven manual for any model-specific cleaning instructions, especially if using a self-cleaning function.
Proper tools and safety measures will make your oven cleaning more efficient and prevent accidental damage to your appliance.
Three Effective Cleaning Methods — Pros & Cons Compared
Cleaning your baking oven can be done in different ways depending on the level of dirt, available tools, and your preference for natural or chemical methods. Below are the three most effective approaches, along with their advantages and disadvantages.
1. Natural DIY Method (Baking Soda + Vinegar / Steam / Lemon)
- How it works: Make a paste of baking soda and water, apply it to the interior (avoiding heating elements), let it sit for a few hours or overnight, then spray vinegar and wipe clean. Steaming with water and vinegar or lemon juice can also loosen grime.
- Pros: Chemical-free, gentle on enamel and glass, safe for regular maintenance, and affordable.
- Cons: Requires patience and scrubbing for stubborn grease; may not remove very heavy baked-on residue completely.
2. Commercial Oven Cleaners (Sprays / Foams)
- How it works: Spray the cleaner inside the oven after removing racks, let it sit as instructed (usually 30–60 minutes), then scrub and rinse thoroughly.
- Pros: Highly effective on tough, baked-on grease; less manual effort needed.
- Cons: Contains strong chemicals; requires gloves, ventilation, and careful handling; improper use can damage surfaces or leave residue.
3. Self-Cleaning or Pyrolytic / Steam-Oven Feature
- How it works: The oven heats to extremely high temperatures (or uses steam) to burn or loosen food residue. After the cycle, simply wipe out the ash.
- Pros: Minimal manual scrubbing, thorough cleaning for heavy buildup.
- Cons: Uses more energy; can produce smoke and odors; not all oven models are compatible; high heat may wear oven parts over time.
By understanding the pros and cons of each method, you can choose the one that fits your schedule, safety, comfort, and how dirty your baking oven is.
Cleaning All Oven Parts — Interior, Racks, Door, Trays, Exterior
A thorough cleaning of your baking oven includes every part — not just the interior. Paying attention to racks, trays, the door, and exterior ensures your oven stays hygienic and functions properly.
Interior
- Clean the walls, floor, and ceiling of the oven using your chosen method (DIY paste, commercial cleaner, or self-clean cycle).
- Avoid applying cleaners directly to heating elements.
Oven Racks & Trays
- Remove racks and trays and soak them in hot, soapy water or a natural cleaning solution.
- Scrub gently with a brush or sponge, rinse, and dry before reinstalling.
Oven Door & Glass
- Use a baking soda paste or glass-safe cleaner for stains and grease.
- For ovens with removable double-glass doors, clean between panes for better visibility and hygiene.
Exterior & Knobs
- Wipe the exterior, control knobs, and seals with a damp cloth or mild detergent.
- Avoid spraying cleaners directly on control panels to prevent damage.
Cleaning each part properly not only keeps your baking oven spotless but also prevents grease and grime from spreading back into the interior during cooking.
Cleaning Frequency & Maintenance Schedule Table
Maintaining a clean baking oven is easier when you follow a simple schedule — here’s a quick overview to help you plan your cleaning routine:
| Cleaning Type | How Often | Tasks | Tips |
| Light Cleaning | After every use | Wipe interior after cooling; remove crumbs, spills, and minor stains | Prevents buildup and makes deep cleaning easier |
| Deep Cleaning | Every 2–3 months (regular bakers) or 3–6 months (occasional use) | Clean interior, racks, trays, door, and exterior thoroughly | Use natural or commercial cleaners depending on the dirt level |
| Preventive Maintenance | Weekly or as needed | Wipe door, knobs, seals; check vents; use oven trays/liners | Avoid aluminum foil on the oven floor; it keeps the oven efficient and hygienic |
Following this schedule ensures your baking oven stays spotless, efficient, and long-lasting while making cleaning less stressful.
Cleaning in Special Cases
Sometimes, regular cleaning methods aren’t enough. Here’s how to tackle special cases in your baking oven:
- Stubborn, Baked-On Grease: For tough grease, apply a thick baking soda paste and let it sit longer, or use a commercial cleaner designed for heavy buildup. Scrub gently with a soft brush.
- Cloudy or Sticky Glass Door: Use a baking soda paste or a glass-safe cleaner. For double-glass ovens, remove the door if possible to clean between panes.
- Hard-to-Reach Corners and Vents: Use a small brush, an old toothbrush, or a vacuum nozzle to remove crumbs and residue from corners or behind vents.
- Gas Ovens: Avoid letting liquid cleaners drip into gas vents. Ensure good ventilation while cleaning, and check the manufacturer’s instructions for any model-specific precautions.
- Odor After Cleaning: If chemical cleaners leave a smell, ventilate the oven well and run it empty at low temperature for 10–15 minutes to burn off residue safely.
These tips handle unusual or stubborn cleaning challenges, ensuring your oven remains spotless, safe, and efficient even in difficult situations.
FAQ: Cleaning a Baking Oven
Yes, baking soda and vinegar are safe for cleaning oven glass. Make a thick paste with baking soda, apply it to the glass, let it sit for 15–30 minutes, then spray vinegar and wipe clean. This removes grease and baked-on residue without scratching the surface. For double-glass doors, you can remove the inner pane if your oven allows it.
For regular bakers, a deep clean every 2–3 months is ideal, while occasional bakers can clean every 3–6 months. Regular light cleaning after each use helps prevent stubborn buildup, making deep cleaning easier and faster. Following a schedule also keeps your oven hygienic and efficient.
Yes, but you need to follow the instructions carefully. Always wear gloves, ensure good ventilation, and avoid letting chemicals contact heating elements or sensitive surfaces. Commercial cleaners are effective on tough grease, but should be used sparingly for safety.
Stubborn baked-on grease may need repeated cleaning. Try leaving a baking soda paste for a few hours or using a stronger commercial cleaner for tough spots. Gently scrub with a soft brush and repeat the process if necessary, avoiding abrasive pads that can damage the oven.
Never clean a hot oven directly. Wait until it has cooled to prevent burns or accidents, especially when using liquids or chemicals. Light wiping after the oven is warm but safe is fine, but deep cleaning should always be done on a fully cooled oven.
Keep Your Baking Oven Spotless
Regularly cleaning your baking oven ensures safety, hygiene, and perfectly baked meals. Combine light routine cleaning with periodic deep cleans, and pay attention to racks, doors, and corners. Choosing the right method keeps your oven efficient, long-lasting, and stress-free for every cooking session.


- Be Respectful
- Stay Relevant
- Stay Positive
- True Feedback
- Encourage Discussion
- Avoid Spamming
- No Fake News
- Don't Copy-Paste
- No Personal Attacks
- Be Respectful
- Stay Relevant
- Stay Positive
- True Feedback
- Encourage Discussion
- Avoid Spamming
- No Fake News
- Don't Copy-Paste
- No Personal Attacks
